Creative Cake Pop Flower Ideas
Highlighted under: Pastry Kitchen
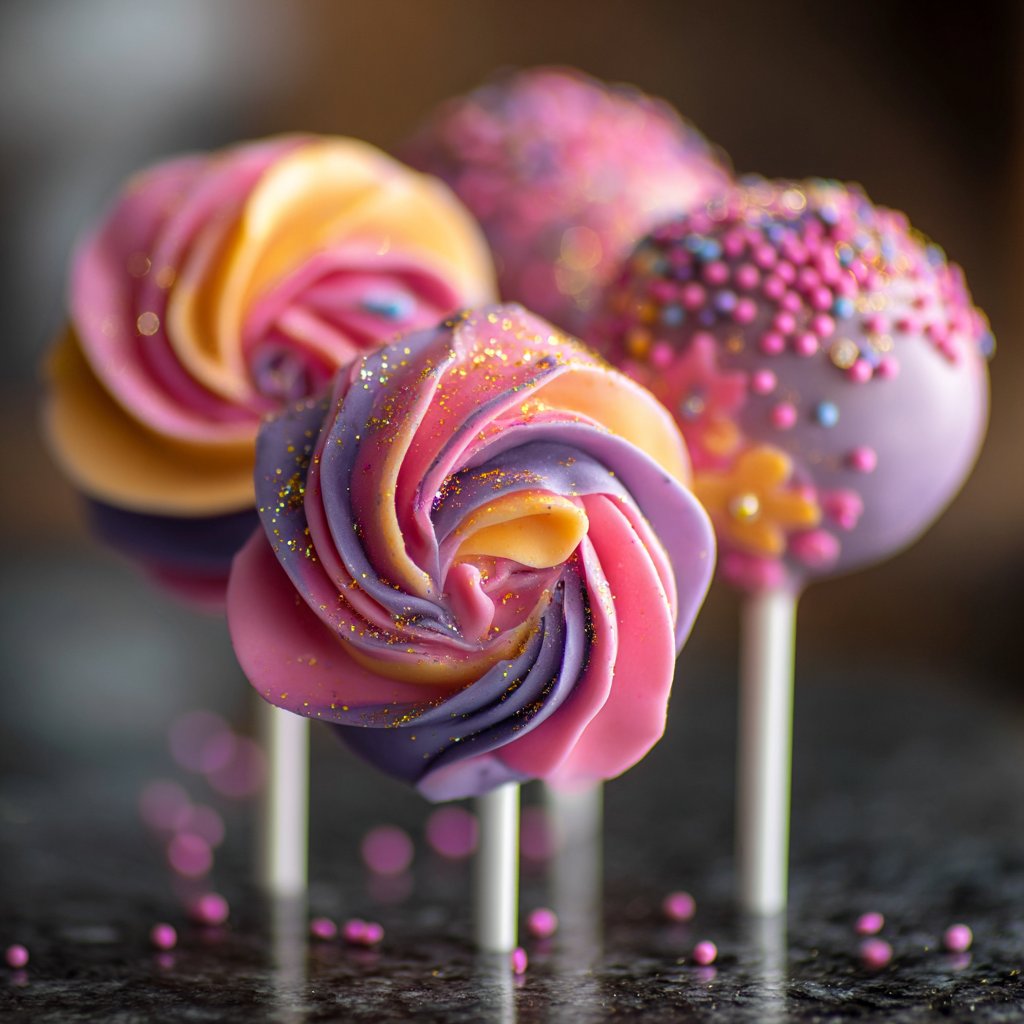
I love exploring new ways to create visually stunning treats, and these cake pop flower ideas make for the perfect centerpiece at any gathering. With a little creativity and some simple ingredients, I can transform ordinary cake pops into delightful floral designs that are sure to impress. Whether it’s for a birthday party, baby shower, or just a fun weekend project, these cake pop flowers are a fantastic way to get the kids involved in baking and decorating. Let’s dive into how to bring these charming treats to life!
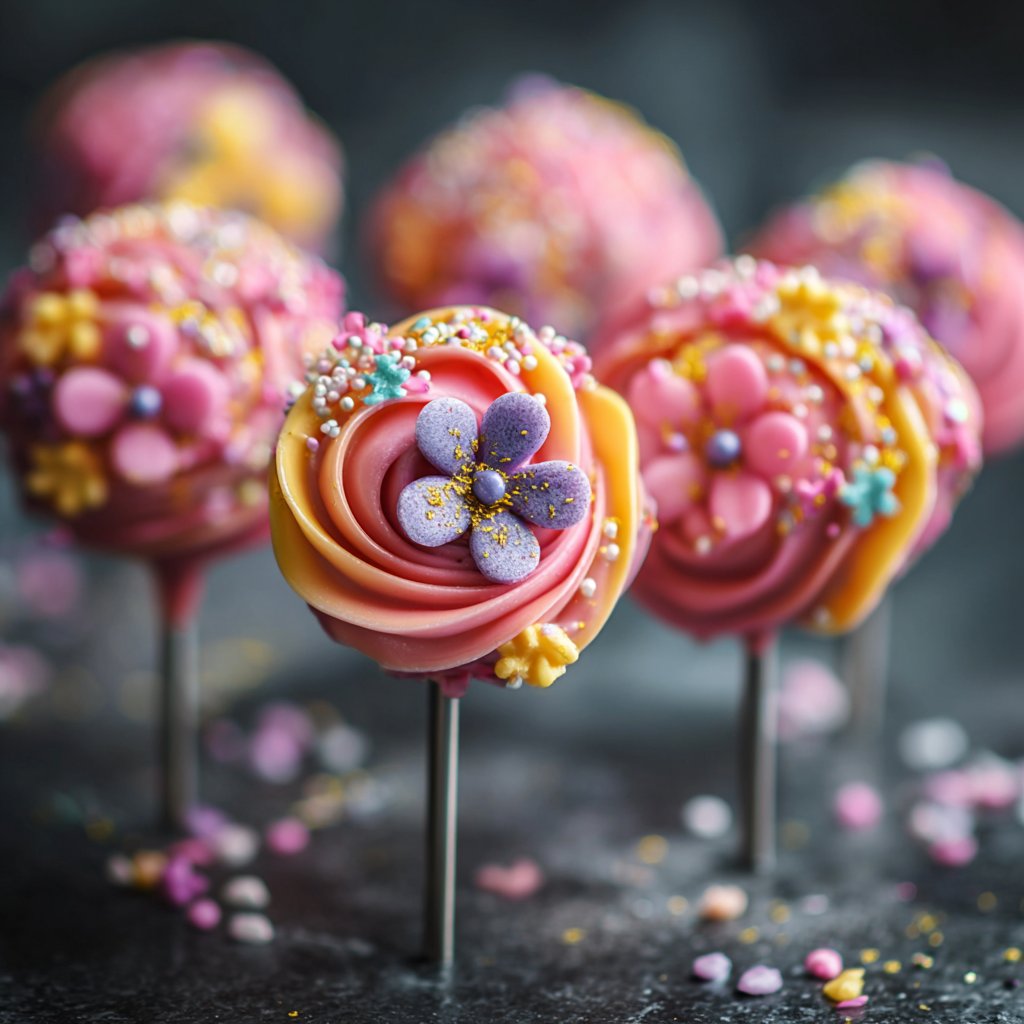
While experimenting with cake pop designs, I discovered how versatile and fun it could be to shape them into flowers. Using simple cookie cutters and some vibrant-colored candy melts, I was able to craft each petal and leaf with ease. I learned that allowing the coating to set slightly before attaching pieces helps maintain their shape without sliding.
The extra step of using edible glitter made the flowers sparkle, adding a magical touch. I was thrilled to see how they became a hit among my family and friends, proving that a little creativity goes a long way in making treats something special!
Why You Will Love These Cake Pop Flowers
- Adorable flower designs that brighten any occasion
- Fun and interactive way to involve the kids in baking
- Customizable flavors and colors to fit your theme
Understanding Cake Pop Consistency
Achieving the right consistency for your cake pop mixture is crucial. Once you crumble your cooled cake, the addition of frosting should create a dough-like texture that holds together without being overly sticky. I recommend starting with 1/2 cup of frosting, but feel free to adjust based on the moisture of your cake. If the mixture is too dry, a small splash of milk can help bind it together without making it soggy.
Remember to chill the shaped cake pops in the refrigerator for about 30 minutes before coating. This firming step not only helps them maintain their shape during dipping but also prevents the sticks from pulling out. If you find that they aren’t sticking together after chilling, consider adding a touch more frosting to bind them better.
Mastering the Candy Coating
Melting candy melts can be tricky if you’re not careful. Use a microwave-safe bowl and heat the candy melts in short increments of 30 seconds, stirring in between until the mixture is smooth and glossy. If the candy becomes too thick to dip, a teaspoon of vegetable oil can help thin it out. This gives a smoother coating that sets beautifully on your cake pops.
Be mindful to fully submerge each cake pop in the melted candy coating. This ensures an even layer, which adds to both the appearance and flavor. After dipping, hold the pop above the bowl and gently tap it to allow excess coating to drip back. If the coating drips unevenly, it can create unsightly runs or drips, so aim for a quick and controlled motion.
Creative Decoration Variations
The decoration possibilities for these cake pop flowers are truly endless. You can experiment with various colors of candy melts to suit different themes or occasions. For a more vibrant effect, consider layering multiple colors on a single cake pop. Drizzle contrasting colors over the flowers after they dry for a beautifully intricate appearance.
Additionally, feel free to add embellishments. Aside from edible glitter, using sprinkles or colored sugars can create a fun and whimsical look. You could also use fondant or royal icing to craft additional decorations, such as butterflies or ladybugs, to place on top for an added touch of charm.
Ingredients
Gather your ingredients to create these delightful cake pops.
For the Cake Pops
- 1 box of cake mix (any flavor)
- 3 eggs
- 1/2 cup vegetable oil
- 1 cup water
- 1/2 cup frosting (store-bought or homemade)
- Candy melts (various colors)
- Lollipop sticks
- Edible glitter (optional)
For Decoration
- Green candy melts (for leaves)
- Sugar sprinkles (optional)
- Flower-shaped cookie cutters
- Floral foam (for display)
Once you have all your ingredients, it's time to create some beautiful cake pop flowers!
Instructions
Follow these steps to create your stunning cake pop flowers.
Bake the Cake
Preheat the oven according to the cake mix instructions. Prepare the cake batter by combining the mix, eggs, oil, and water, then bake it in a greased pan as directed. Allow the cake to cool completely.
Form the Cake Pops
Crumble the cooled cake into a mixing bowl and add the frosting. Mix until well combined. Shape the mixture into small balls and insert lollipop sticks. Chill in the refrigerator for about 30 minutes.
Melt the Candy Coating
Melt the candy melts according to package instructions. Dip each cake pop into the melted candy and allow excess to drip off.
Decorate as Flowers
Using flower-shaped cookie cutters, cut flowers from the rolled-out candy melts and place them around the cake pops to create petals. Use green candy melts to form leaves. Add edible glitter for extra sparkle.
Display and Enjoy
Insert the completed cake pops into floral foam for a beautiful display. They’re now ready to serve and impress your guests!
Your creative cake pop flowers are ready to bring joy and sweetness to any event!
Pro Tips
- For added flavor, consider swapping the frosting with flavored cream cheese or adding extracts to the cake mix. Make sure to let the candy melts cool slightly before applying them to prevent melting the cake pops.
Serving Suggestions
Displaying your cake pop flowers creatively adds an interactive element to any gathering. Placing them in floral foam or a decorated pot can make them look like a blooming bouquet. You can also pair them with complementary treats like cupcakes or cookies for a cohesive dessert table setup.
If you’re serving them at a children’s party, consider setting up a ‘decorate your own cake pop’ station. Set out additional toppings and let the kids personalize their pops. This not only makes for a fun activity but also gives them a sense of ownership over their creations.
Storage Tips
If you want to make these cake pops ahead of time, they can be stored in an airtight container. They typically stay fresh for up to a week at room temperature, but if you want to keep them longer, consider refrigerating them. Just make sure to let them come to room temperature before serving to restore their intended texture.
For longer storage, uncoated cake balls can be frozen. After shaping them, place them on a baking sheet and freeze until solid. Then, transfer them to a freezer-safe container for up to three months. When you’re ready to use them, allow to thaw while preparing your candy melts, and you’ll be all set for a quick cake pop creation.
Questions About Recipes
→ Can I use a different type of frosting?
Yes, you can use any frosting you prefer, but cream cheese or buttercream provides a lovely flavor combination with cake pops.
→ How long do these cake pops last?
These cake pops can last up to a week if stored in an airtight container at room temperature.
→ Can I freeze cake pops?
Absolutely! You can freeze them either before or after decorating. Just wrap them tightly and store in a freezer-safe bag.
→ What can I use for a stand?
Floral foam is great for holding them upright, but you can also use a cake pop stand or even a styrofoam block.
Creative Cake Pop Flower Ideas
Created by: The Chefemilycooks Team
Recipe Type: Pastry Kitchen
Skill Level: Intermediate
Final Quantity: 24 pops
What You'll Need
For the Cake Pops
- 1 box of cake mix (any flavor)
- 3 eggs
- 1/2 cup vegetable oil
- 1 cup water
- 1/2 cup frosting (store-bought or homemade)
- Candy melts (various colors)
- Lollipop sticks
- Edible glitter (optional)
For Decoration
- Green candy melts (for leaves)
- Sugar sprinkles (optional)
- Flower-shaped cookie cutters
- Floral foam (for display)
How-To Steps
Preheat the oven according to the cake mix instructions. Prepare the cake batter by combining the mix, eggs, oil, and water, then bake it in a greased pan as directed. Allow the cake to cool completely.
Crumble the cooled cake into a mixing bowl and add the frosting. Mix until well combined. Shape the mixture into small balls and insert lollipop sticks. Chill in the refrigerator for about 30 minutes.
Melt the candy melts according to package instructions. Dip each cake pop into the melted candy and allow excess to drip off.
Using flower-shaped cookie cutters, cut flowers from the rolled-out candy melts and place them around the cake pops to create petals. Use green candy melts to form leaves. Add edible glitter for extra sparkle.
Insert the completed cake pops into floral foam for a beautiful display. They’re now ready to serve and impress your guests!
Extra Tips
- For added flavor, consider swapping the frosting with flavored cream cheese or adding extracts to the cake mix. Make sure to let the candy melts cool slightly before applying them to prevent melting the cake pops.
Nutritional Breakdown (Per Serving)
- Calories: 150 kcal
- Total Fat: 7g
- Saturated Fat: 4g
- Cholesterol: 15mg
- Sodium: 50mg
- Total Carbohydrates: 22g
- Dietary Fiber: 1g
- Sugars: 14g
- Protein: 2g